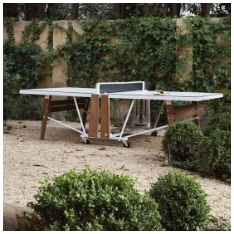
Outdoor pool tables are designed to withstand various weather conditions, making them more robust than their indoor counterparts. However, moving them still requires a meticulous approach. The key to a successful move lies in proper preparation and disassembly, which we'll cover in this article.
Understanding Your Pool Table
Before you begin, it's important to understand the specific type of outdoor pool table you have. Outdoor pool tables come in various designs and materials, including slate and non-slate options. Knowing the type of table you're dealing with will help you prepare appropriately.

Gathering the Necessary Tools and Materials
To move an outdoor pool table, you will need specific tools and materials. Here’s a checklist to help you get started:
- Socket wrench set
- Screwdrivers
- Measuring tape
- Moving blankets
- Bubble wrap
- Labeling tape
- Markers
- Furniture dolly
Having these tools on hand will make the disassembly and moving process smoother.
Preparing the Pool Table for Disassembly
Proper preparation is essential for a smooth disassembly process. Follow these steps:
Clear the Area
Ensure the area around the pool table is clear of any obstacles. This will provide you with enough space to work and move components as you disassemble the table.
Clean the Pool Table
Clean the surface of the pool table to remove any dust or debris. This prevents any particles from getting into the components during disassembly.
Remove Accessories
Take off all removable accessories such as balls, cues, racks, and the pool table cover. Pack these items separately in a labeled box.
Step-by-Step Disassembly Process
Disassembling your outdoor pool table requires attention to detail. Follow these steps carefully:
1. Remove the Pockets
Using a screwdriver, carefully remove the pockets from the table. Place the screws in a labeled bag to keep track of them.
2. Detach the Rails
Next, use a socket wrench to remove the bolts securing the rails. Carefully lift the rails off and wrap them in moving blankets to protect them during transport.
3. Take Off the Felt
Removing the felt requires precision. If you plan to reuse it, gently detach it from the table by pulling out the staples or glue holding it in place. Roll the felt carefully to avoid wrinkles and place it in a protective cover.
4. Disassemble the Slate
If your outdoor pool table has a slate top, this step is critical. Slate is heavy and fragile, so enlist the help of friends or professionals. Use a socket wrench to remove the screws securing the slate to the frame. Carefully lift the slate pieces off the table and wrap them in bubble wrap for protection.
Packing and Labeling Components
Proper packing and labeling are crucial to ensure all parts are accounted for and protected during the move.
Wrapping Components
Use moving blankets and bubble wrap to securely wrap each component. Pay special attention to delicate parts like the slate and pockets to prevent any damage.
Labeling
Label each wrapped component clearly. This will make reassembly much easier and quicker. For example, label the rails as "Left Rail" and "Right Rail" to avoid confusion.
Conclusion
Disassembling an outdoor pool table requires patience and precision. By following the steps outlined above, you can ensure that your pool table is prepared for a safe move. In the next part of our guide, we will cover the actual moving process and reassembly. Stay tuned for more detailed instructions on how to move an outdoor pool table.


