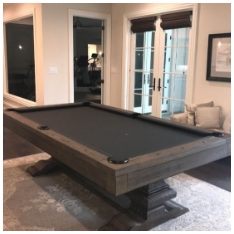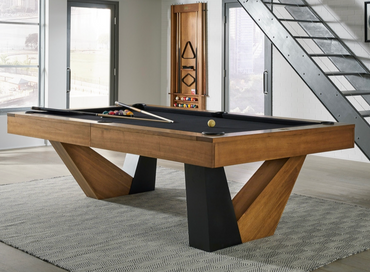
Building a pool table is a detailed process that combines design planning, woodworking, precision fitting, and careful finishing. A well-made table is not only about appearance. It must offer a level playing surface, strong frame support, accurate rail response, and long-term durability. For this reason, the process requires skill, the right materials, and attention to every measurement.
Many people search for How to Build a Pool Table: The Custom Table-Making Process because they want to understand what goes into creating a table that looks good and performs properly. Whether the table is made for a home game room, club, office, or entertainment space, each stage plays an important role in the final result.
Planning the Pool Table Design
The first step in building a pool table is planning the design. This includes deciding the table size, style, wood type, finish, pocket type, and overall look. Common pool table sizes include 7-foot, 8-foot, and 9-foot tables. The right size depends on the room space and the purpose of use.
During this stage, the table maker also considers the interior setting where the table will be placed. A traditional room may suit a carved wooden frame, while a modern room may need a clean and simple design. Custom tables can also include special finishes, unique legs, custom rail shapes, or branded details.
Choosing the Right Materials
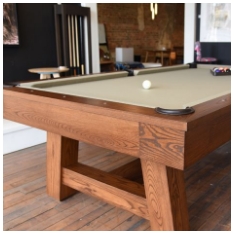
Material selection has a direct impact on the quality and life of the pool table. Hardwood is often preferred for the frame, legs, and rails because it provides strength and stability. Popular choices include oak, maple, walnut, mahogany, and ash.
The playing surface usually uses slate because it offers a smooth, flat, and durable base. Slate is heavy, but it provides better accuracy than wood-based surfaces. A quality pool table often uses one-piece or three-piece slate, depending on the design and installation needs.

Key Materials Used in Pool Table Making
The main materials include hardwood for the structure, slate for the playing surface, rubber cushions for rail bounce, pool cloth for the surface covering, leather or synthetic pockets, screws, bolts, brackets, and finishing materials. Each material must be selected carefully to support both strength and performance.
Building the Frame Structure
The frame acts as the foundation of the pool table. It must be strong enough to support the weight of the slate and remain stable during regular use. The table maker cuts and prepares the wood according to the approved design and size.
The frame is then assembled using strong joints, screws, bolts, and support beams. Proper alignment is important because even a small error in the frame can affect the level of the playing surface. Cross beams are often added to distribute the slate weight evenly and prevent sagging.
Crafting the Legs and Base
The legs support the full weight of the table, so they must be strong and properly attached. In custom pool table making, the legs can be simple, carved, tapered, or designed to match the overall style of the room.
Once the legs are crafted, they are connected to the base frame. The connection must be firm and balanced. Adjustable levelers may also be added to the bottom of the legs. These help level the table after installation, especially if the floor is not perfectly even.
Preparing and Installing the Slate
Slate installation is one of the most important steps in the custom table-making process. The slate must be measured, cut, drilled, and positioned correctly. For three-piece slate tables, each section must be aligned perfectly so that there are no gaps or uneven points.
After placing the slate on the frame, the table maker checks the level using precision tools. Any seams between slate pieces are filled and smoothed. This creates a continuous playing surface. If this step is not done properly, balls may roll unevenly during play.
Adding the Pool Table Cloth
After the slate is leveled and prepared, the pool cloth is installed. The cloth must be stretched evenly across the slate surface. It should not be too loose or too tight, as this can affect ball speed and movement.
The cloth is usually stapled or fixed under the slate or frame, depending on the table design. Care is taken to avoid wrinkles, folds, or uneven tension. The cloth is also fitted neatly around pocket openings and rail sections.
Why Cloth Quality Matters
Pool table cloth affects speed, control, and overall play. A smooth and durable cloth helps the balls move consistently. Poor-quality cloth can wear out quickly and may affect the playing experience. This is why professional table makers select cloth based on table use and customer preference.
Making and Fitting the Rails
Rails are another important part of a pool table. They hold the cushions that allow balls to bounce during play. The rails are built from hardwood and fitted with rubber cushions. These cushions must be installed at the correct height and angle.
After the cushions are fixed, the rail cloth is wrapped around them. The rails are then attached to the table using bolts. Proper rail alignment ensures consistent ball response from every side of the table.
Installing the Pockets
Pockets can be made from leather, rubber, or synthetic materials. The type of pocket depends on the style of the table. Drop pockets are common for home tables, while ball-return systems are often used in commercial settings.
Each pocket must be fitted securely to the rails and frame. The openings should be shaped properly so that balls enter smoothly. In custom tables, pocket details can also be designed to match the table finish.

Sanding, Staining, and Finishing
Once the structure is complete, the wooden parts are sanded to remove rough edges and prepare the surface for finishing. The table maker then applies stain, polish, paint, or protective coating based on the selected design.
The finish improves the table’s appearance and protects the wood from moisture, scratches, and wear. Multiple coats may be applied for a smoother and longer-lasting result. Each coat must dry properly before the next step.
Final Leveling and Quality Check
The final stage is leveling and testing the pool table. The table maker checks the slate, rails, pockets, cloth tension, and overall stability. Balls are rolled across different areas of the table to confirm smooth movement.
If any issue is found, adjustments are made before the table is ready for use. This final inspection ensures that the table is not only attractive but also functional and reliable.
Conclusion
Understanding How to Build a Pool Table: The Custom Table-Making Process shows how much skill and accuracy are required to create a quality table. From design planning and material selection to slate fitting, cloth installation, rail alignment, and finishing, every step affects the final performance.
A custom pool table is built to match both playing needs and design preferences. When made properly, it becomes a long-lasting piece that adds value, function, and style to any space.